
You probably think about using Microsoft Azure to host your WordPress blog. Azure gives you great scalability features that are important if you want to scale up your website. There are also many other services that could be useful for your blog. I created a new WordPress blog in Azure and want to describe in this blog post, which steps I performed and what it needed to set it up to get a full up and running Azure blog.
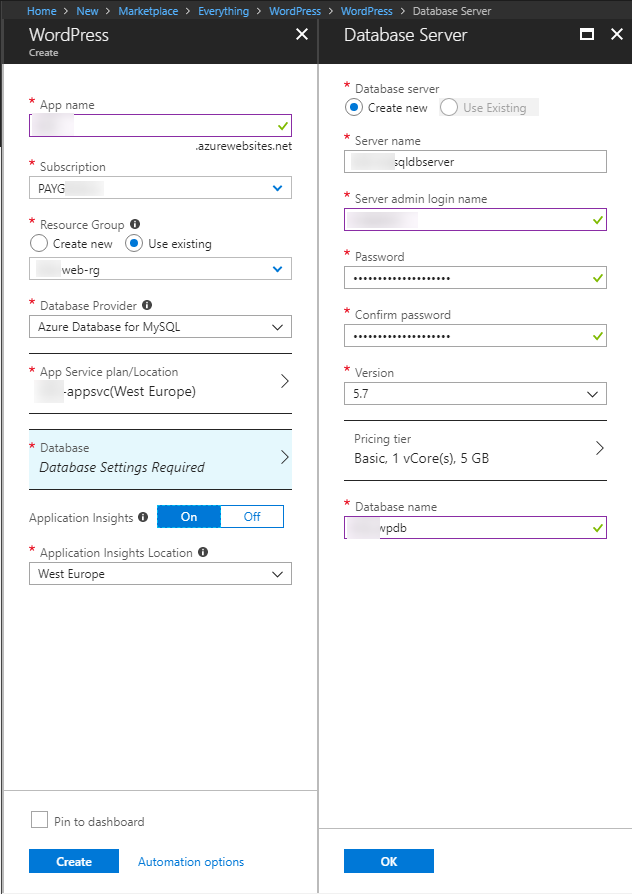
Before creating the new WebApp required for the wordpress blog, I suggest to create the resource group at first. If you do this manually, then you can decide the location of the resource group, if you just create the web app and create the resource group during that step, the default location is US.
+ Create a resource – “Resource group” – set the properties and done
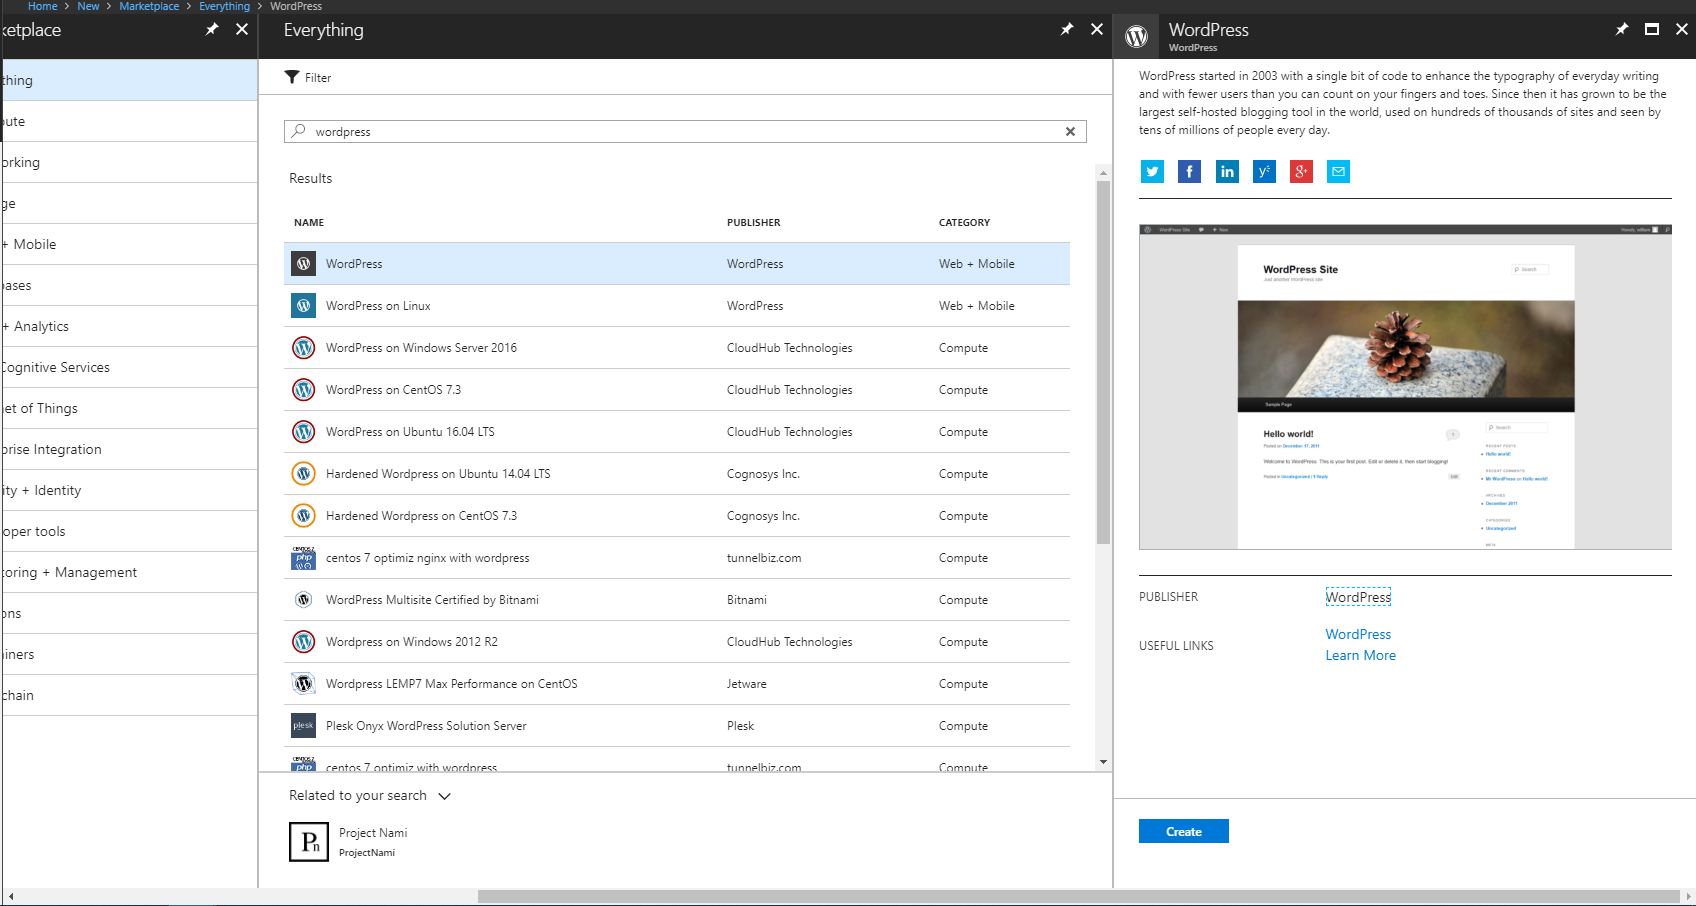
Create a new resource and search for WordPress. You’ll find a few resources and you can decide where you want to run your wordpress blog. I decided to use WordPress and not the “on Linux” because the standard app service has more features (e.g. you can use extensions and install let’s encrypt).
After successful deployment, navigate to your App Service and click the browse button. The first time you have to setup wordpress and enter some basic data as the Title or the admin. I suggest that you don’t use “admin” as username – for security reasons, it’s better to use e.g. “mysite-admin”.
Complete the setup and login to wordpress (https://mysite.azurwebsites.net/wp-admin).
Basic WordPress configuration
The following 4 things are the basics that I do for each wordpress installation.
Those 4 steps do not include installation of plugins or configuration of analytics.
- Install theme that should be used
- Cleanup WordPress
- remove Hello World comment, post and page
- Remove all installed plugins
- Remove all themes that aren’t in use
- Update WordPress and all components to the latest version
- Go through all settings and configure them (Tagline, timezone, permalinks, …)
I will not describe these steps – navigate through wordpress and do all basic steps.
Domain configuration
To use custom domains, you need at least the basic app service plan. The configuration is quite simple. Open the web app and go to custom domain and Add hostname:
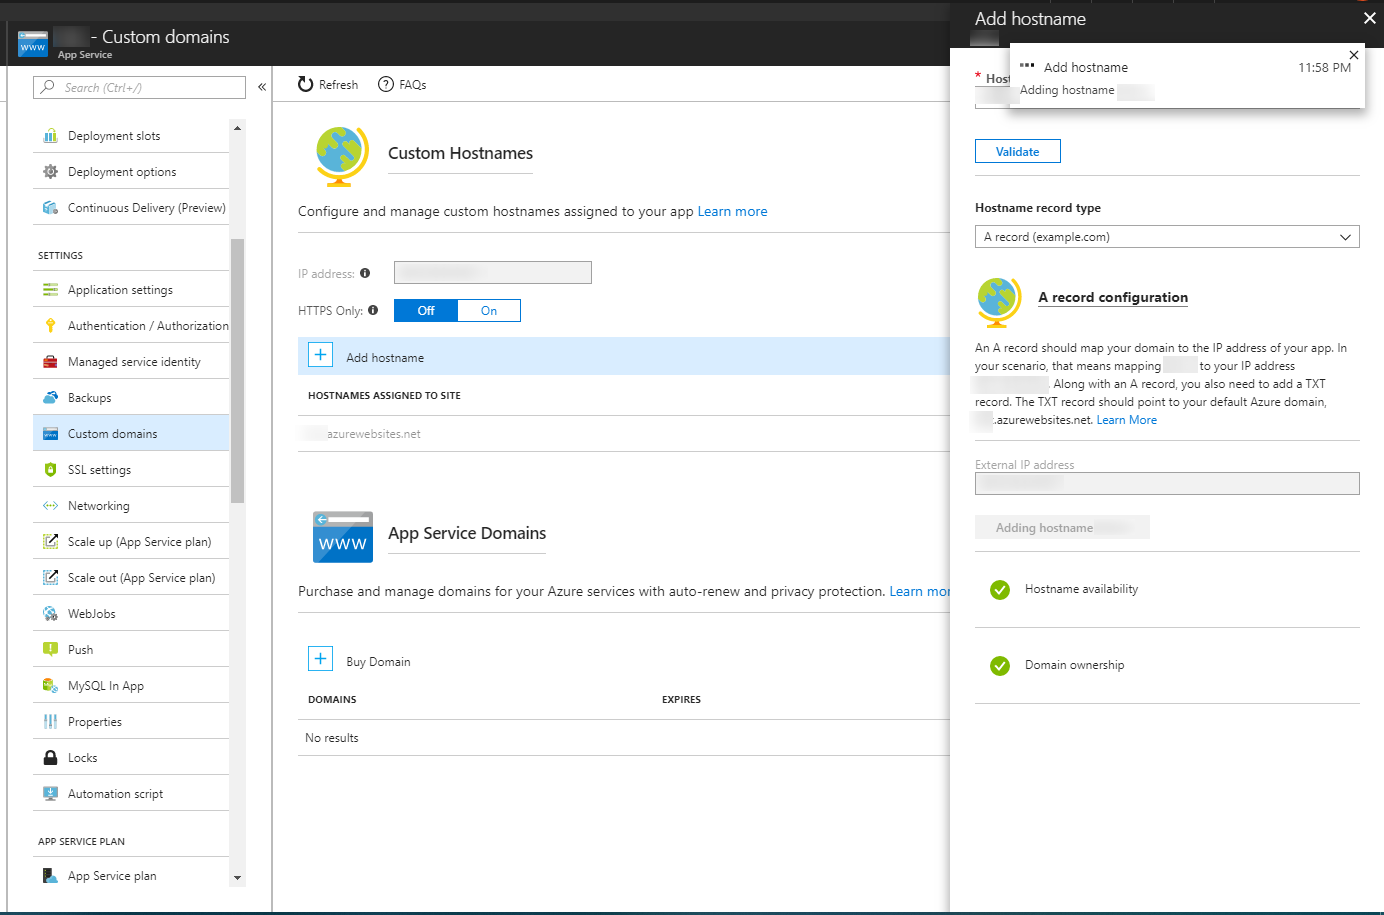
To proof that you are the owner of the domain, you have to add a txt record to your DNS settings. You also should update the A record, so that the site forwards to the azure website.
Let’s encrypt SSL certificate
Next step is to configure the SSL certificate for your domain. I described this in another blog post that you can find here: Let’s encrypt for Azure Websites
After the installation, you can go back to “custom domains” and activate the “https only” setting to enforce users to use HTTPS.
Allow WOFF files
When you already installed a theme and you open your wordpress page with active developer tools, then you’ll probably recognize, that the .woff files can’t be loaded:
Failed to load resource: the server responded with a status of 404 (Not Found)
To fix that, you have to update the web.config file for the app service and add the following parts:
<configuration>
  <system.webServer>
    <staticContent>
        <mimeMap fileExtension="woff" mimeType="application/font-woff" />
        <mimeMap fileExtension="woff2" mimeType="application/font-woff" />
     </staticContent>
  </system.webServer>
</configuration>
Configure email settings
Easiest way is to use the plugin:
And configure it for your mail server. I will use SendGrid because on the one hand, it is integrated in Azure, offers 25k Mails/month for free and I already used it e.g. here: Send Mails with C# in Azure. On the other hand, if you use Office365 as Mail server, then you need to create a separate account and assign a new license to that account. So let’s continue with SendGrid:
Add a new sendgrid Account in Microsoft Azure (as described in the link above) and go to “manage” after the account is created. You can now configure your domain at the sendgrid site (new whitelabeled domain + DNS configuration + validation) and create an API key for the wordpress site.

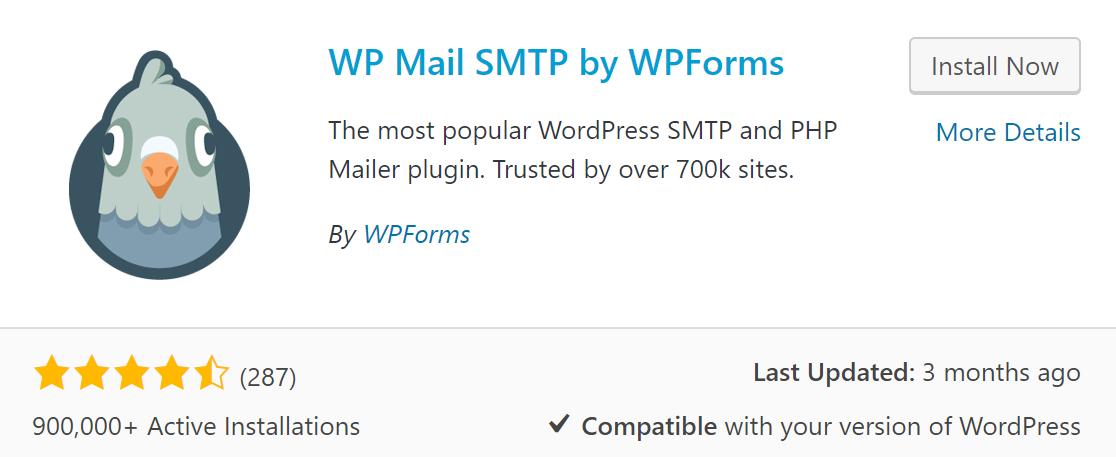
Copy your API key and configure WP Mail SMTP by WPForms:

Cloudflare
To speed up our website, have DDoS protection and to reduce the traffic to Azure, we should use a CDN provider like Cloudflare, so create a Cloudflare account at first. After that, click the + Add Site button and enter the domain of your website (at cloudflare portal). Confirm the upcoming things, choose your plan. After that, Cloudflare will query your DNS and will tell you to change your nameserver.
Do that according to the instructions by cloudflare and wait a bit. This can take up to 24 hours, but as soon as it’s done, all traffic is routed through cloudflare.
Once it’s done, you can see and configure cloudflare. The standard settings are quite okay, but if you want, you can e.g. configure:
- DNS: check if all necessary A records are routed through cloudflare
- Crypto: enable always use ssl, enable HTTPS rewrites
- Speed: enable auto minify
Navigate to your website and check if everything works as expected.
Install WordPress Plugins
Please only install the plugins that you really need. The following ones are those that I use on different websites and blogs:
- Jetpack: Is a plugin provided by wordpress and contains different useful things like stats, share
features etc. - Cloudflare: allows you to easily optimize cloudflare for wordpress
- Shield: a security addin that offers e.g. recaptcha usage etc.
- SyntaxHighlighter evolved: enter code to your blog posts
- WP Image Borders: adds borders to images
- WP Lightbox 2: lightbox for images
- WP Super Cache: caching addin
- WP-PageNavi: adds a navigation with page numbers to the blog
- Yoast SEO: search engine optimization
Restrict access to the webapp
Before we continue to configure all the content for our website, we probably think about restricting the access to the website while we configure/develop it.
Fortunately the Azure webapps have a nice feature for that. Navigate to your webapp and select Authentication / Authorization
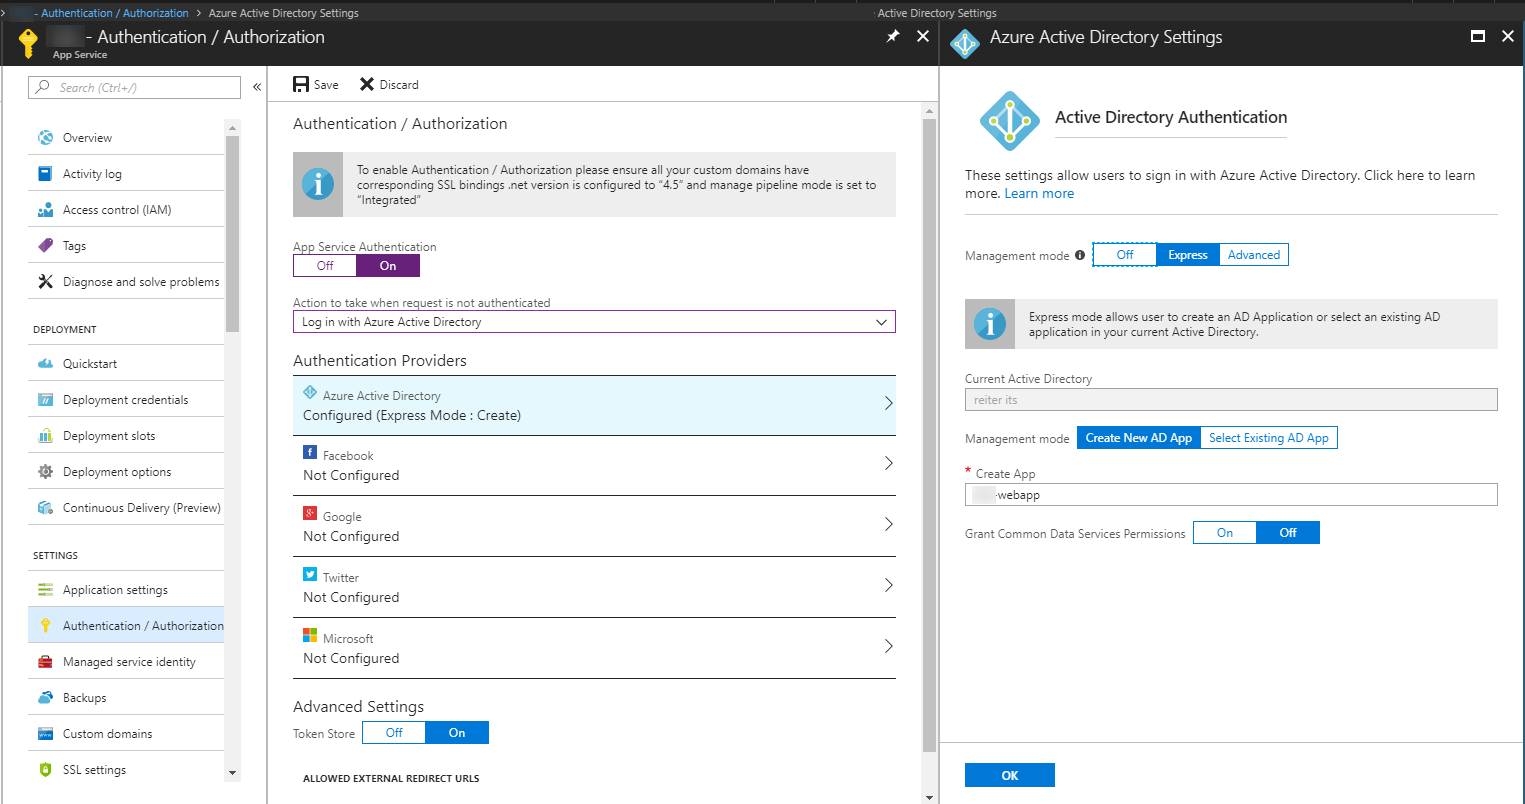
I decided to use my azure active directory for login. With that configuration, every user in the active directory is allowed to access the webapplication with his user and password. If you want to restrict it to some specific users, go to:
Azure Active Directory – Enterprise Applications – “your application” – Properties
And set “User assignment required?” to yes. The users and groups that are allowed to access the app can be configured in the “users and groups” setting.
Note: If you restrict it this way, then some configuration steps should already be done – e.g. adding jetpack addin or configuring let’s encrypt. Those two steps require a public facing website. You can, by sure, always deactivate authentication for a short period and re-activate after configuration.
Customize your theme – the right way
You’ll sometime start to customize your theme – stylesheets and other things. There is a dirty way how to do it, and a nice way. The nice way is described in more detail here: https://codex.wordpress.org/Theme_Development
In this section, I’ll summarize the details steps from the link above and reduce it to minimal steps you need to do if you just want to customize the stylesheet:
Let’s assume that the theme you want to use i named “nicetheme”. You’ll find a folder “nicetheme” in wp-content/themes. To customize the css, do the following steps:
1. Create a new folder “nicetheme-myname” in the wp-content/themes folder (e.g. “nicetheme-codehollow”)
2. Create a new file “style.css” and add the following content to it:
/*
Theme Name: MyName Theme
Theme URI: https://myurl.com/
Description: mydescriptin
Author: myname
Author URI: https://mywebsite.com/
Template: nicetheme
Version: 1.0.0
*/
/* your css code */
3. Create a new file functions.php with the following content:
<?php
// silence is golden
add_action( 'wp_enqueue_scripts', 'enqueue_parent_styles' );
function enqueue_parent_styles() {
wp_enqueue_style( 'parent-style', get_template_directory_uri().'/style.css' );
}
4. Go to Appearance – Themes and activate your theme. If you don’t see it, check your style.css, especially the beginning of the file (if all information is there)
Note: If you already customized the theme, then you must do this customizations again. You can also use the plugin “Customizer Import/Export” to export the customizations and import them again. It’s also a way to backup your customizations.
Google Analytics
I assume that you already have a google analytics account – if not, create one. Then install the plugin “Google Analytics Dashboard for WP (GADWP)”, activate it and follow the instructions on the screen.
Outlook
The basic wordpress setup for a productive environment is done. Especially the usage of Cloudflare will already help to scale the system, as the website usually serves a lot of static files.
If you have a lot of dynamic files, or many users, then the configuration of auto-scaling in Azure will be useful. That would currently go beyond the scope.


2 Responses
[…] WordPress Blog on Azure – full setup guide by Armin Reiter […]
In the Azure marketplace there is now a Windows Server 2016 image with WordPress that comes pre installed with MySQL, IIS & phpMyAdmin as an alternative option: https://azuremarketplace.microsoft.com/en-us/marketplace/apps/cloud-infrastructure-services.wordpress-windows-2016?tab=Overview
The post configuration guide can be found on : https://cloudinfrastructureservices.co.uk/how-to-setup-wordpress-on-windows-2016-in-azure/